
How To Make…Shamballa Style Sparkle Bracelet
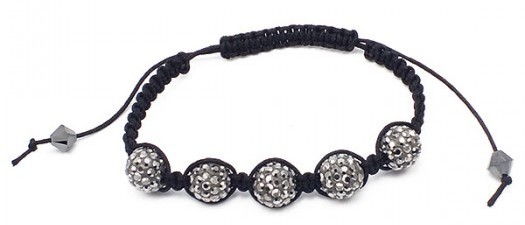
Shamballa style bracelets are one of the latest crazes to hit the beading world. Although they look difficult, they’re actually really easy to make, as the whole bracelet is based around one technique.
It’s much easier to make if you have a flat surface like a table or tray, as you can stick your bracelet down as you make it. Make sure you’re not using something coated in varnish or paint, though, because it might come off when you remove the tape!
Now, onto the bracelet!
Step One
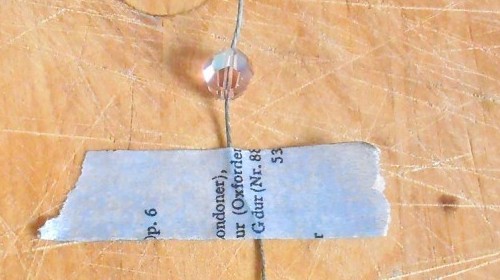
Firstly, cut a piece of cord approximately 50cm long, and tie an overhand knot at one end. Now, slide a Swarovski bicone up to the knot and tie another knot about 10cm away. The Swarovski bead should now be trapped inbetween the two knots. Tape the knotted end of the cord about 50cm away from the edge of the table.
Step Two
Thread on your Shamballa beads, then tape the other end of the cord to the edge of the table closest to you. This will be your base cord, and will run through the core of your bracelet.
Leave your Shamballa beads at the end of the cord, nearest to you, as they won’t be needed until later.
Step Three
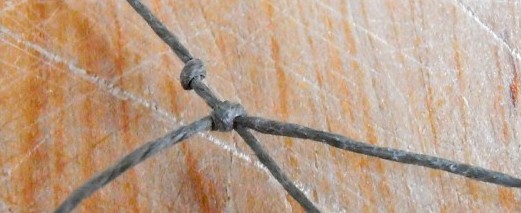
Take a piece of cord approximately two metres long. Thread this under your base cord, so that there’s one metre on either side of it. Knot this as close to the last knot as you can. You should now have approximately 1 metre of cord on either side of the base cord.
Step Four
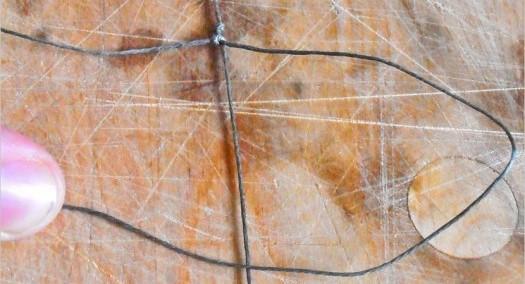
Now, take the piece of cord on the right hand side. Bring this over the top of the base cord, leaving a loop on the right hand side and a tail on the left hand side.
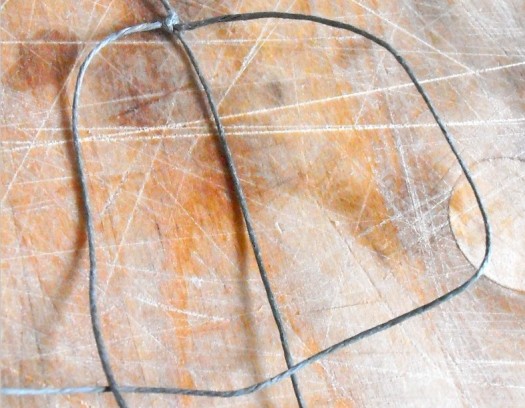
Step Five
Take the piece of cord from the left hand side and place this over the top of the tail you’ve just brought across from the right hand side.
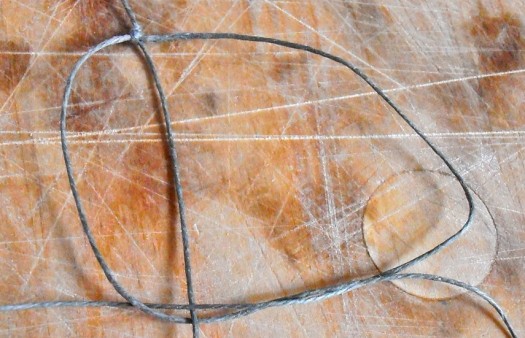
Step Six
Get the cord you’ve just placed over the top of the tail. Thread this under the base cord and up through the loop you created on the right hand side. Pull this taut.
Step Seven
You’ve now created the first half of a square knot. Each square knot is split into two halves; for the second half, repeat Steps 4 and 5 but reversed. Instead of starting on the right hand side, start on the left. Now reverse Step 6.
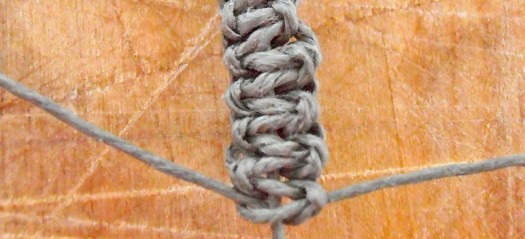
Step Eight
Repeat this process a few times, until you have a row of knots. You can do as many knots as you like for the section – I like to make this section about half an inch long.
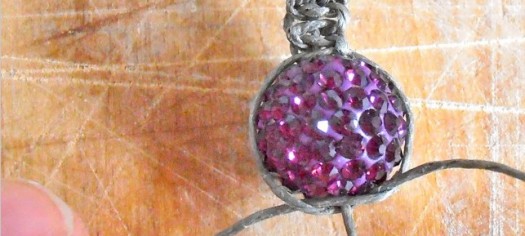
Step Nine
Next, slide up one of your feature beads from the bottom of your base cord. Secure this in place by using the square knot technique. When tying this knot, you will find that the cord will naturally fall around the bead you have added.
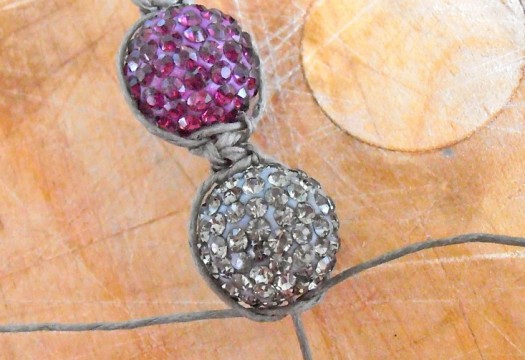
Step Ten
Now, add the rest of your feature beads, adding square knots in between them as you go. I like to tie two square beads inbetween each bead. You can space these out whichever way you like best.
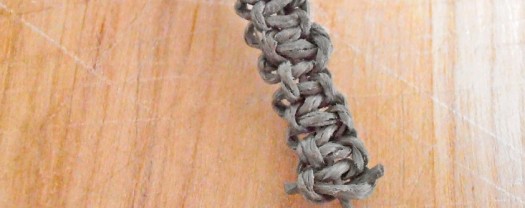
Step Eleven
Once you’ve added all of the feature beads, create some more square knots at the end so that both ends of your bracelet are even in length.
Step Twelve
Add a dab of glue or nail varnish to the last knot that you made and trim off the leftover tails so that only the base cord remains. Add a Swarovski bicone onto the opposite end to the other one and tie another knot so that each end is equal.
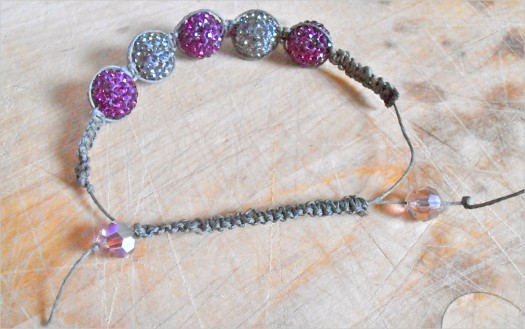
Step Thirteen
You will now need to create the adjustable knot at the back of your bracelet. Take off both pieces of tape that are holding your base cord in place, and bring both ends across each other, creating a bracelet shape.
Step Fourteen
Next, take a new piece of cord approximately 1 meter long. Thread this under both pieces of cord – there should now be approximately half a metre of cord on either side.
Step Fifteen
Using the new piece of cord, tie a few more square knots over both ends of the base cord. Do this until you have the desired length for your bracelet, then glue the last knot. Once this has dried, you should be able to pull both of the tails to adjust the size of the bracelet.
Get the Kit
Comments are closed here.