
Learn The Simple Multi-strand Neckalce Technique
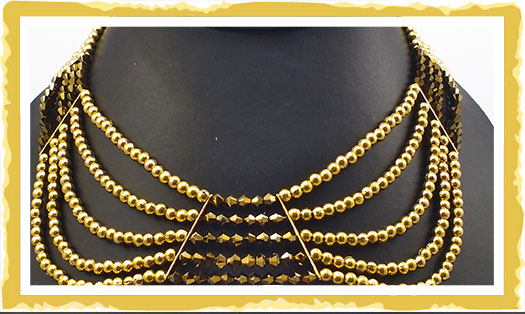
The Simple Multi-strand Technique
This simple necklace creates a really vintage glamorous look. Learn the simple multi-strand technique that creates a collar type look, both vintage inspired and bang on trend.
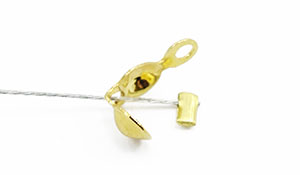
Start by cutting 5 lengths of Beadalon jewellery wire, approximately a metre each. This will be more than enough but it is better to overestimate. Attach a calotte onto the end of each strand of wire by threading the wire through the centre hole of the calotte, adding a crimp and then flattening the crimp. Then close the calotte around the crimp, making sure these are firmly and securely closed.
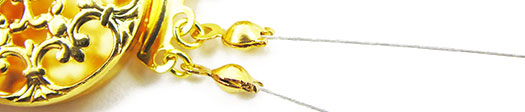
Next attach each of the calottes to one side of your box clasp with the 3mm jump rings.
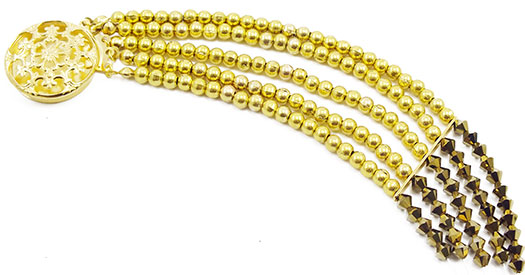
Next, starting with the outside string, thread on 26 gold plated metal beads, 25 to the next string in, 23 to the next, 21 to the next and finally 20 beads to the inner string.
Now thread on a divider by stringing through each hole and pulling tight to see how everything hangs. Next thread on your Swarovski Bicones. 11 beads to the outer string, 9 beads to the next string, 8 to the next, followed by 6 and finally 5 on the inner string.
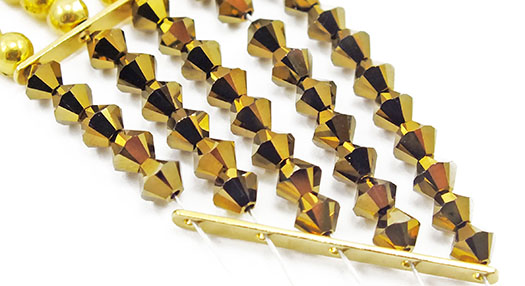
Add another divider and carry on with the same pattern until you have 4 sets of gold beads and 3 sets of Swarovski beads.
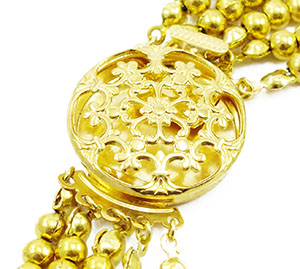
Make sure you pull everything tight, add a calotte to the ends of the wire. Add a crimp bead and flatten, close the calotte and trim the excess wire. Do this one string at a time to make sure everything is pulled tight. Attach to the other side of your box clasp using the 3mm jump rings and your necklace is ready to wear!
Design Note
You can use any beads for this design. Plastic spacer beads will make the project much cheaper but using quite heavy weight metal beads will give the necklace a really expensive, weighty feel and ensure that everything sits correctly.
You could try mixing your metals or try a silver version of the necklace, using contrasting purple toned beads.
Top Tip
- Use the same amount of beads on each strand to avoid the collar look created here. You can have a play around with the effect.
- Be aware that with this type of necklace, once the beads are added, there will be no short cut of how to restring should you not be happy with the design. You would have to restring the whole necklace.
Jewellery Making Products
x460 4mm Plain Metal Spacer – Gold Platedx117 Swarovski 5328 – 6mm Xilion Bicone Bead – Dorado 2x – 10pk
x1 30mm Round Filigree Box Clasp – Gold Plated
x10 Bottom Hinge Calottes – Gold Plated
x10 3mm Thin Jump Rings (0.6mm) – Gold Plated – 120pk
x6 5 Hole Divider, 27mm – Gold Plated
x10 2mm Round Crimp Beads – Silver Plated Approx. 5m Beadalon 7 Strand Beading Wire 0.46mm (.018in) – Bright – 9.2m (30ft)
Comments are closed here.