
How To Make a Retro Wrapped Wire Square Bangles
Create Janine’s eye-catching square bangles. Why not stack these in a mixture of metals and beads for a retro look that is easy to make, without the need to solder use any specialist equipment.

These bangles are a great introduction to creating cold connections. It can sometimes be a bit scary to start creating chunky, metal and wire based pieces, but with these bangles, there is no need to have any specialised equipment and no need to solder. The bangles are made simply with a wire wrapping technique and can be made in any combinations of beads and look especially great with pearls or crystals for some added sparkle. Why not mixed your metals and stack several bangles together?
DESIGNER SECRET
Have fun with hammering your wire but don’t go two crazy or the two sides of your square may end up different sizes. Remember to keep checking sizes as you go.
STEP BY STEP
Step 1
Start by straightening out a length of the thick wire with some flat nose pliers. Wire usually comes on a reel but you will need a straight line. Bend the wire down at two points to create a ‘c’ or ‘bracket’ shape.
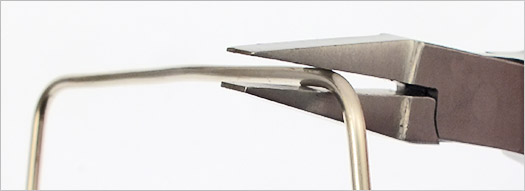
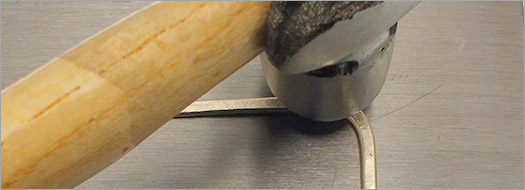
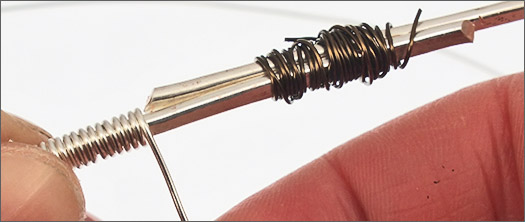
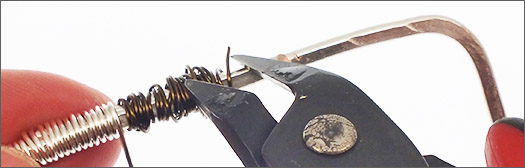
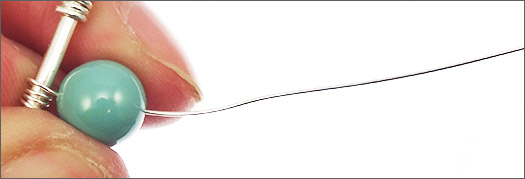
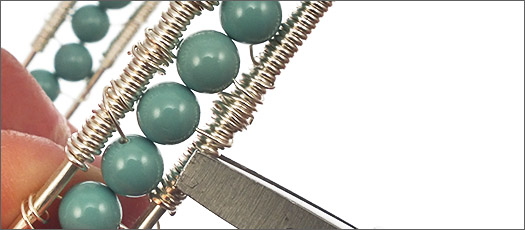
You will need to do this again to create the other side of your square. Carefully measure the other side against your first piece of bent wire. You’ll need to make another square for the other side of your bangle too. So it’s a good idea to make these together before you hammer your wire. Using a bench block (pop a folded bead mat underneath to stop excess noise) carefully hammer your wire, staring with the corners, and constantly checking that all the ‘brackets’ match up. Hammering tends to distort the wire a bit so you’ll have to use some flat nose pliers to coax it back into the original shape. Hammering also hardens metal so don’t overdo it. As you’re working with craft wire you shouldn’t notice this too much. When all your ‘brackets’ match up and are hammered, take two of them and temporarily bind together with a thin piece of wire on each side. This doesn’t have to be neat as you will be cutting it off later. Now carefully cut off the excess so that you have a neat square with two edges that overlap. You will be wrapping the overlapped sides to neaten everything up. When you have done this with both side of your bangle and they fit together to make a square you can start wrapping your bangle. Take about just over half a metre of 0.6mm wire and wrap one end of the wire about a centimetre from the corner of your first side. Always start with the overlapped sides to strengthen the square. Carefully wrap the wire around the whole length of the side, getting the wire as close to the last loop as possible. When you reach your temporary wire in the middle, and you’re happy that it is secure enough not to move when you remove the temporary piece, cut this off and carry on wrapping the 0.6mm wire until you reach about a centimetre from the other end. Do this on all eight sides. When all eight sides are complete, it’s time to start assembling the bangle. It will feel like you will need several pairs of hands for this at first but you will soon find a rhythm. Take the two side of the bangle and a length of about a metre of 0.4mm craft wire. Secure the wire onto one side of the bangle by wrapping neatly several times, and then add your first bead. Thread through the second square and wrap the wire around this half twice to secure. Turn the bangle around and pass the wire back through the square and add another bead. Make sure it is tight to the first bead and secure to the other side again by double wrapping. Turning the bangle each time allows you to pass the wire back through and thread the next bead neatly and pull everything tight. Carry on around the whole bangle. Once you have filled you bangle and it is sturdy and fully beaded, secure the last bead by wrapping neatly several times around your frame and snipping off any excess wire. Using flat nose pliers (nylon jaw if you’ve got them) flatten down any wire that may be sticking out or feels rough and your bangle is ready! Products Used ToolsStep 2

Step 3
Step 4

Step 5
Step 6
Step 7
Step 8


Comments are closed here.