
Evoke the glamour of 1940’s Hollywood with the gorgeous chandelier earrings

Janine is Office Manager at The Beadshop Manchester, and has been designing jewellery both at work and in her spare time for about 3 years. She loves to use Swarovski, mixed metals and loves experimenting with different techniques.
Using Simple wire wrapping and bending techniques, without using specialist tools, Janine shows you how to achieve an elegant and professional glamorous look. The antique brass colours mixed with deep Swarovski Crystals add a slightly gothic edge to these gorgeous creations.
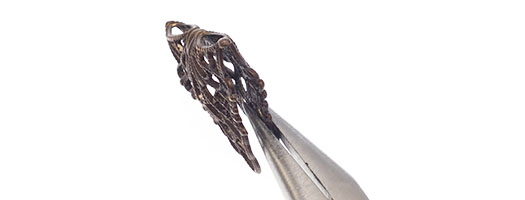
STEP 1
Start by making the main filigree part of your earring. Take one of your filigree’s and using a pencil or something of a similar width, bend your filigree so that it is equally bent in half. The filigree shouldn’t touch at the sides so don’t squeeze together; there should be a gap of about 5mm. You can perfect the shape with a pair of chain nose pliers.
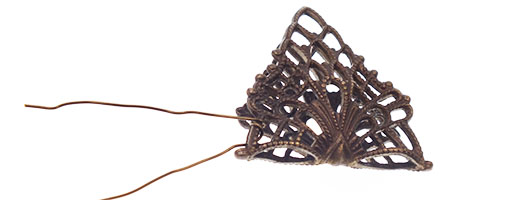
STEP 2
Now take about half a meter of craft wire and start by wrapping the wire around one side of the top hole of the filigree. Do this by threading about 2 inches through the gap in the filigree and up through the front. Neatly wrap this 2 inch section around and through the same hole several times to secure.
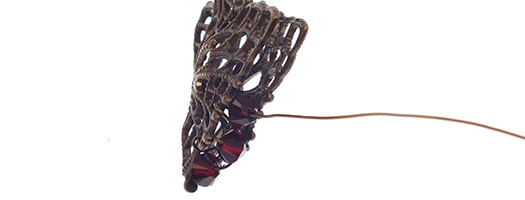
STEP 3
Add a 4mm siam bicone, thread through the next hole opposite, back up with the middle of the filigree, then add another bicone and thread through the opposite side again. Do this until you reach the bottom, and add an erinite bicone. Carry on up the other side and secure at the top in the same way. There should be 5 bicones on each side and one erinite.

STEP 4
Add your 10mm Bicone to an eye pin and make a simple loop. Add the 9mm Jump Ring through the folded over end of the Filigree, so it sits in the middle. Add the 10mm bicone to the jump ring by opening the eye pin a little and close again neatly.
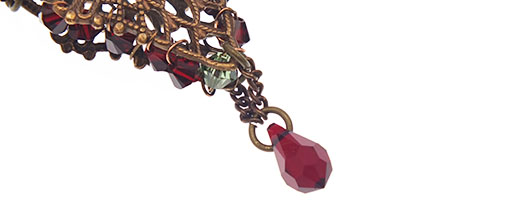
STEP 5
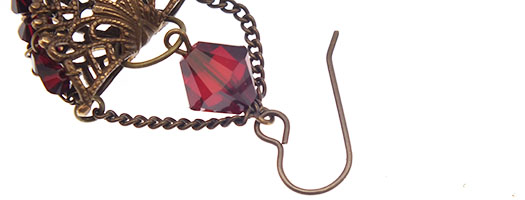
At the pointed end of the filigree, add about 4 links of chain to each pointed side of the filigree using 4mm jump rings. Add a 5mm Jump ring to the siam drop and add both the ends of chain.
STEP 6
Cut two lengths of chain (I’ve used 12 links but if your loops are bigger you may need more, measure against your earring) and using 4mm jump rings, add a length of chain to each side of the filigree. Open the top loop of your eyepin, add on each side of the chain and the ear wire in the middle. Close your eyepin, repeat the process for the other earring.
Handy Tips & Advice:
- When adding your 4mm bicones, remember that there are no definite, evenly spaced holes on the filigree, so you will have to thread through the next available space. It won’t look perfectly even but that is the effect.
- 4mm Jump rings can be a little fiddly but will create a more subtle look to the piece.
- If you are struggling to open and close the small jump rings you could go up a size.
- You could buff the metal with a metal reliefing block if you wanted to achieve a more ‘golden’ effect to the metal.
EXTRA PROJECTS
Necklace
Using one of the Filigrees, bend the very corners of the filigree in and around to form a sort of loop and thread your chain down this loop. Secure the chain with a Swarovski Siam drop on each side and add a clasp.
Ring
Bend the filigree around a ring mandrel and perfect the shape with some chain nose pliers. It may be good to flatten the filigree a little. Add a 9mm Jump ring to the same point as you did on the earrings and attach erinite bicones and siam drops to the jump ring. You can add as many as you like!
Comments are closed here.